Growing Asparagus
Growing Asparagus
Dr. Leonard Perry, Horticulture Professor
University of Vermont
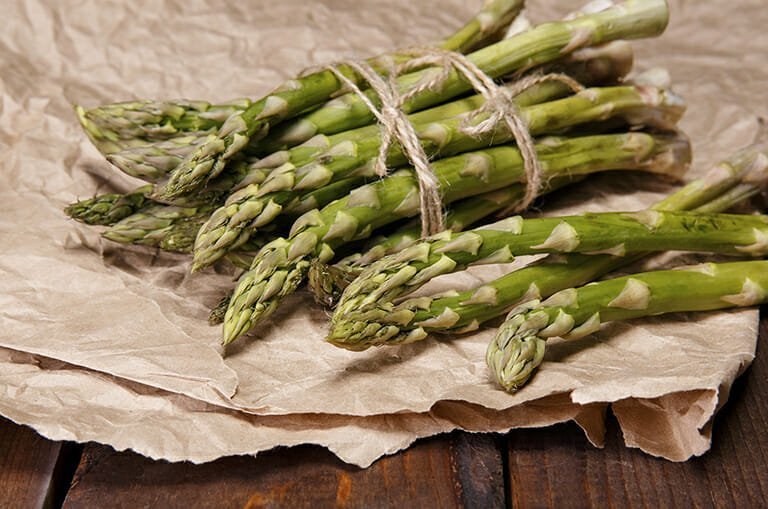
Asparagus is a tasty perennial (comes back each year) vegetable that many gardeners like to grow. While most vegetables produce later in the season, asparagus produces its edible parts (stems) right up front early in spring. Since an asparagus patch can produce for a dozen years or more, it is more important than with most any other vegetable to make sure you site it where it can stay, and to prepare the soil properly before planting.
The site should be in full sun. Ideal is 8 hours or more of direct sun a day, although plants will tolerate (but be less vigorous) with 4 to 8 hours of direct sun. If planting in an existing garden, avoid areas where onion family crops were grown previously. If possible, avoid planting near the edge of the garden where grass and weeds may invade.
The soil should be well-drained and weed-free. If you haven’t tested the soil recently, do so with kits from your local Extension Service office or home kits available at garden centers. The soil pH (acidity) should be 6.5 to 7.5. If lower than this, which is often the case, you may need to add some lime according to the test results.
 Begin by digging a trench about 6 to 8 inches deep for the newer hybrids, working in ample amounts of compost or composted manure both to the trench and the soil you’ll use to backfill. Older heirlooms are best planted about 12 inches deep. Asparagus plants are sold in spring as dormant crowns—basically a mass of roots with some buds or eyes on top. Make sure you plant while they are still dormant (not growing, about when daffodils are blooming), and don’t plant ones whose roots are obviously shriveled and dried out.
Spread these roots out in the trench with the tops, of course, facing upwards. Space about 18 inches apart, as they will spread and like lots of room. Cover with only 2 to 3 inches of soil, and water well. As the shoots (spears) emerge, add a couple more inches of soil, until eventually the trench is filled back in. Then mound the soil slightly, so water doesn’t collect around plant bases during rains or watering.
Keep watered if needed—if there isn’t an inch or so of rain a week—watering deeply when you do water. Watering deeply once a week is better than watering lightly every day.
Keep plants weeded. This includes any plants, including seedlings produced from the red berries that some varieties (those that are “open pollinated” and not all male) produce. Hand weeding is best, or make sure not to damage the plant roots if using a hoe. Applying a straw mulch after harvest can help reduce weeds and retain soil moisture.
There are not too many problems to watch for on asparagus. The asparagus beetle can nibble on spears. Look for their dark eggs on the surface of spears, and scrape any off. Reddish brown spots on spears are likely the asparagus rust disease, which can be treated with sprays.
The first year don’t harvest any young spears, but let them grow to produce the airy, fern-like shoots that will help plants establish. The second year you can harvest a few spears on vigorous varieties. Harvest only 2 or 3 spears per plant, over a two week period.
The third year you can begin a full harvest, IF the average spear size is pencil thickness. Once an asparagus bed is established, you can harvest over four to eight weeks. In cool springs you may be harvesting every 3 days. In a hot spring you may need to harvest daily.
So what to harvest? Snap spears off at the soil level when they are 6 to 8 inches tall and the tips are still tightly closed. If you won’t be using them right away, cut the spears just below the soil level so they have some of the white, woody base. This will help them remain fresh for a few days and lose less water. Place spears in an inch or so of water, upright, in the refrigerator. Or, you can soak in cold water a few minutes, then drain and store in the refrigerator in plastic bags. They will keep for about a week.
Don’t keep harvesting all spears all season, as they need some to form the tops that will produce the food for the plant to remain healthy, and grow well the next season. Stop harvest when new spears are skinny, and spear tips turn feathery—loose and open. This is often about the time you start to harvest peas.
 Add 3- to 5-inches of compost over and around plants when you finish harvest. Asparagus are heavy feeders since they need to produce enough shoots for us, for themselves, and to live from year to year. If you use an organic fertilizer in addition, or instead of as much compost, use one with high levels of nitrogen (the first of the three numbers in the analysis on the bag), and moderate levels of phosphorus and potassium.
At the end of the season, cut back the tops when they turn brown and brittle. Topdress another 3 inches or so of compost or rotted manure over plants, then several inches of straw over this. Use weed-free straw, not hay which often contains weed seeds. The first will help enrich the soil for the following season, while the latter will help protect the plants over winter.
One of the standard heirloom varieties that has been around a while but is still good, and is rust resistant, is Mary Washington. A similar one is Martha Washington. There are several hybrids from Rutgers University that produce many thick, tender spears and are disease resistant. Look for Jersey Giant, Jersey Knight, or Jersey Supreme. Purple Passion and Pacific Purple have, as the names indicate, purple spears. The former has 20 percent more sugar than green varieties. The purple will change to green when cooked.
4/1/15
Distribution of this release is made possible by the University of Vermont and New England Grows–a conference providing education for industry professionals and support for university outreach efforts in horticulture.
Receive your complimentary Relocation guide and magazine


